On this page
UNE for ArcGIS supports linear referencing. Linear referencing is the method of storing geographic locations by using relative positions along a measured linear feature. Distance measures are used to locate events along the line. More information on linear referencing here.
UNE supports both point features and line features. Point features are stored in a table as a distance along a line. Line features are stored as start and end measures along a line.
Linear referenced features are handled in the application as though they are ordinary features. Behind the scenes UNE will ensure they are stored as measures in a table. Many of the tools in UNE alter their behaviour to make working with linear features easier.
Preparing the data
UNE for ArcGIS does not yet support the linear referencing model built into ArcGIS Pro. It is not based on geometries with m values recorded against vertices.
To enable linear referencing in UNE, it is necessary to prepare the data with specific fields.
Route Feature Class
| Name | Type | Purpose |
|---|---|---|
| Linear ID | GUID | Unique identifier for the route feature. |
| Title | String | A field to show as the display title for a feature. |
The fields may be given a name/alias.
Points – Event Table
| Name | Type | Purpose |
|---|---|---|
| Linear ID | GUID | Unique identifier for the parent route feature. |
| Distance | Double | The distance along the parent route feature, at which this event feature is located. |
| Title | String | A field to show as the display title for a feature. |
The fields may be given a name/alias.
Lines – Event Table
| Name | Type | Purpose |
|---|---|---|
| Linear ID | GUID | Unique identifier for the parent route feature. |
| Start | Double | The distance along the parent route feature, at which this event feature starts. |
| End | Double | The distance along the parent route feature, at which this event feature ends. |
| Title | String | A field to show as the display title for a feature. |
The fields may be given a name/alias.
Relationship Configuration
A relationship class must be setup between the Line (Route layer), and the Event table. This relationship should be a 1:many. It must not be based on an ObjectID or GlobalID field. Instead a GUID field and/or a text field should be used.
The Event table and Route layer must both be added to the web map.
Configuration in the UNE Builder
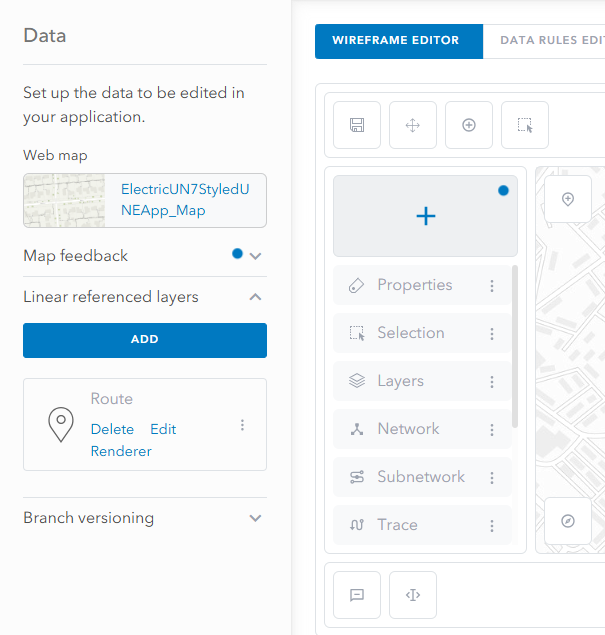
- In the Wireframe Editor, open the Data panel by selecting the Data button in the map area.
- Open the Linear referenced layers section, and click Add.
- Give the linear referencing layer a title.
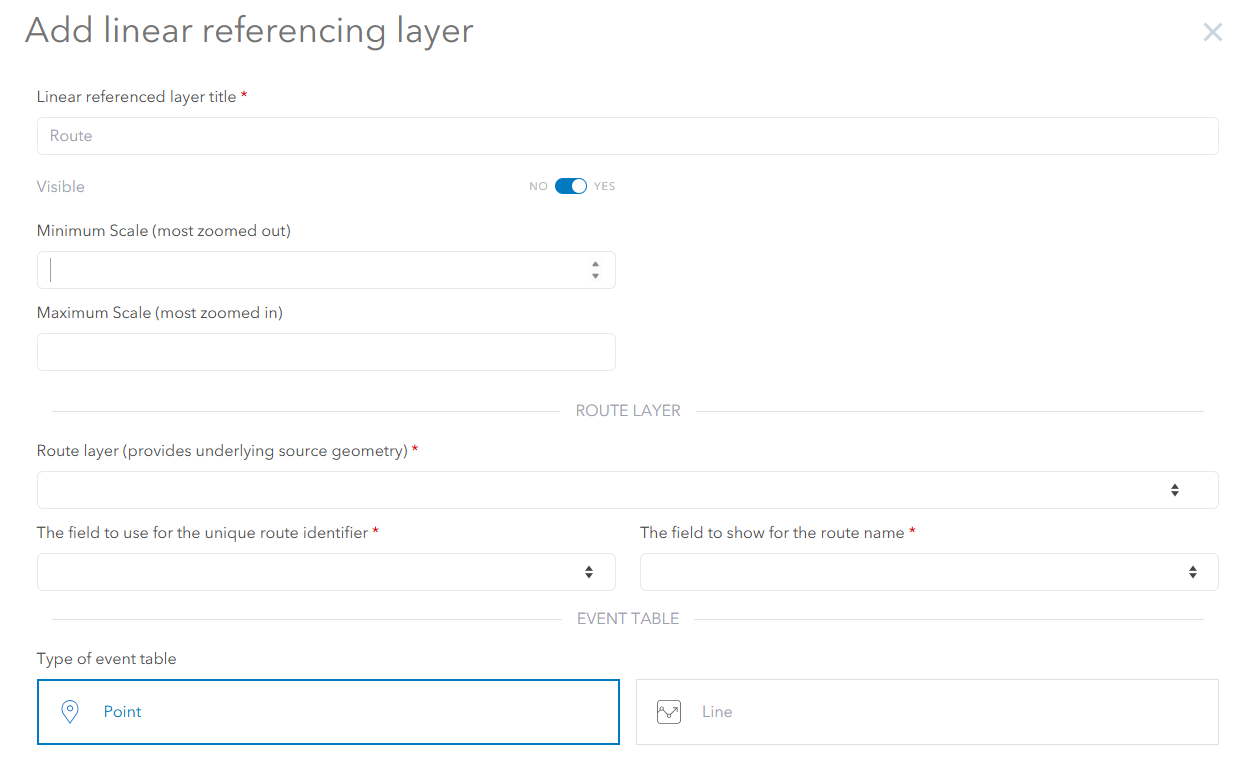
- Under Route layer, select the line layer from the layers drop down, which is to act as the parent route feature.
- Select the GUID field for The field to use for the unique route identifier and The field to show for the route name.
- Under Event Table select the table from the layers drop down.
- Select the GUID field for the unique route identifier and fill in the required fields for measurements and titles.
- Once the linear reference layer is added, ensure that a unique ID field calculation rule is set up on the route feature layer’s linear id field. See Attribute Rules.
- If configuring a linear referencing layer for line events, specify how the feature should be displayed (see below), and if the layer should show line direction.
Rendering
By default, linear referenced event features will be symbolised using a simple plain renderer.
It is possible to override this default renderer, by configuring a renderer. The renderer can either use a simple renderer, or a more complex value based rendered can be imported.
- In the Wireframe Editor, open the Data panel by selecting the Data button in the map area.
- Open the Linear referenced layers section.
- On the layer of interest, click Renderer.
- Import or set the renderer, using the dialogue.

To setup a complex value based renderer, the following approach can be used:
- Create a new layer in ArcGIS Portal, with the exact same fields as the event table of interest. If it is a point event table, then a point layer should be configured. Similarly if it is a line layer, create a line layer.
- Load the new layer into a new web map in the portal map viewer.
- Configure the renderer for the layer in the web map and save the web map with a temporary name.
- In UNE, import the renderer for the linear referenced layer from the temporary web map.
- The web map can now be deleted along with the layer. These were used solely to help configuration and are not needed further.
Display offsets and scale thresholds
Scale thresholds can be configured for linear referenced layers. This allows the layers to be hidden at inappropriate scales. Similarly, it is possible to set whether a linear referenced layer is initially visible in the map. These settings can be found in the linear referencing layer configuration dialog.
Line-based linear referenced features can be difficult to see as they will sit on top of their underlying route feature. Similarly, there may be several event features all overlapping each other and hence displayed on top of each other. For this reason, a number of display options are available to make it easier to distinguish features. These are:
- None: Line event features will sit on their underlying route feature.
- Offset from line: Line event features will be shown offset from their parent route features. Overlapping linear events will sit on top of each other.
- Offset both sides: Line event features will be shown offset from their parent route features. Overlapping linear events will switch sides, to avoid being on top of each other. If there are many overlapping linear events they will be displayed on top of each other.
- Multiple level offset: Line event features will be shown offset from their parent route features. Overlapping linear events will switch sides, to avoid being on top of each other. If there are many overlapping linear events they will offset themselves again.
- Offset using expression: To provide fine grained control over how sibling linear refenced features are displayed, it is possible to define an expression to exactly calculate an offset.
Offset expression
When using an offset expression, before each feature is displayed, its offset will be evaluated using an expression.
The expression will run synchronously and not be able to access data from other map layers.
The expression will have the following globals:
$feature: The event feature about to be displayed.$routeFeature: The event feature’s parent route feature.$siblings: An array of sibling features that exist on the same parent route feature.$pixelsPerMeter: The number of screen pixels representing 1 meter.
The script should return an offset distance in meters.
The following is an example script to calculate an offset:
/** Returns a distance in meters that the event feature is to be drawn
 * offset from the route feature
 * If a negative number if returned it will be offset to the right
 * otherwise it will be offset to the left
 */
 return 10 * $pixelspermeter